28 November 2017

Terrain for 6mm Wargaming: North African Seacoast

The Rommel Operation Brevity scenario required some sea tiles. These are impassible to troops and vehicles but artillery can fire over them. I decided to go with the 13cm square tiles from the BigRedBat's Shop again, no concerns here about placing bases on the tiles as noted above. I have used up my original order, so a second order was placed. This should cover my needs for 10 further mountain tiles and some wadi tiles. Should be then good.

Again I used Elmer's Wood Filler as the base; this really is excellent stuff, it is quite cheap and workable. I tried to put a double pattern in with straight horizontal lines to represent the beach and curved lines to represent the water. I used both Citadel and VMC paints. It was pretty simple and I like how it came out.
Stegadon Scale Green base highlighted with Sotek Green
Highlighted with Citadel Temple Guard Blue
Highlighted with VMC Sky Blue
Highlighted with VMC Pale Grey Blue
Final highlight of Citadel Scar White. A border of very fine sand was then added , had to remember that this was 1/285 scale. Once I get the polyurethane out to do the bases, I will apply some to the water.
I enjoyed doing these and they look good on the table. I will be getting my first game of Rommel in this Thursday with my friend Adam. I am looking quite forward to it. I am hoping to post a playtest of the rules before then.

22 November 2017

Rommel: An Exciting New Project


I have been interested in gaming the North African theatre of WWII for several years. A previous attempt was unsuccessful and I ended up selling the 15mm DAK and 8th Army forces I had assembled. I felt that anything but a grand tactical game just did not duplicate the battles fought in the desert as I had imagined.

Then along came Rommel a ruleset by Sam Mustafa that was solely aimed at this level of wargaming.   I have been gaming WWII at the skirmish level using Chain of Command and enjoying it greatly but felt the WWII North African battles just did not lend themselves to skirmish gaming. I have played several games by Sam and enjoyed them including Lasalle and Longstreet. I assembled an army for Blucher but just could not get interested and sold them. Coming from the Sharpe tradition of Napoleonics, grand-tactical wargaming just did not attract me.

Anyway I was excited and by this time I had 10 years of wargaming under my belt and this experience had provided me with better tools on how to plan things. As my wargaming armies have expanded, storage and transport have become critical. It was interesting to watch other gamers plan their armies for Rommel. I could, of course, use my 20mm figures of which I have an extensive collection (but of course not in desert livery), but that was just unattractive to me.

After having a look I decided it had to be microscale, either 2, 3 or 6 mm. I wanted to be able to recognize things so I decided to go with 6mm or 1/285 scale. GHQ and CinC are the main manufacturers in the 1/285 scale. The other 6mm manufacturers are a little smaller at 1/300 scale, but I understood although GHQ are quite expensive at $2.40 per unit, they had the best selection. I could ameliorate this by using CinC models which are priced at $1.40 per unit. Their range is much less but they have the basics especially trucks of which I require a great number.

Next up was basing. I use a 6x4' table and this appears to be the standard for Rommel with 6" squares (Rommel uses a grid system of movement). I could of gone with 4" squares but I felt with 6mm models this would limit the base size significantly and thus the number of models with which I could populate each base. After a lot of thought and discussion on the Honour Forum, I decided to go with 70x45mm bases as three (the limit in the ruleset) could fit in a 6" grid. For transport and aesthetic reasons I am now going with metal bases for all my armies. I am just not attracted to basing with a high profile, they just look to me like playing pieces rather then actual troops and vehicles.

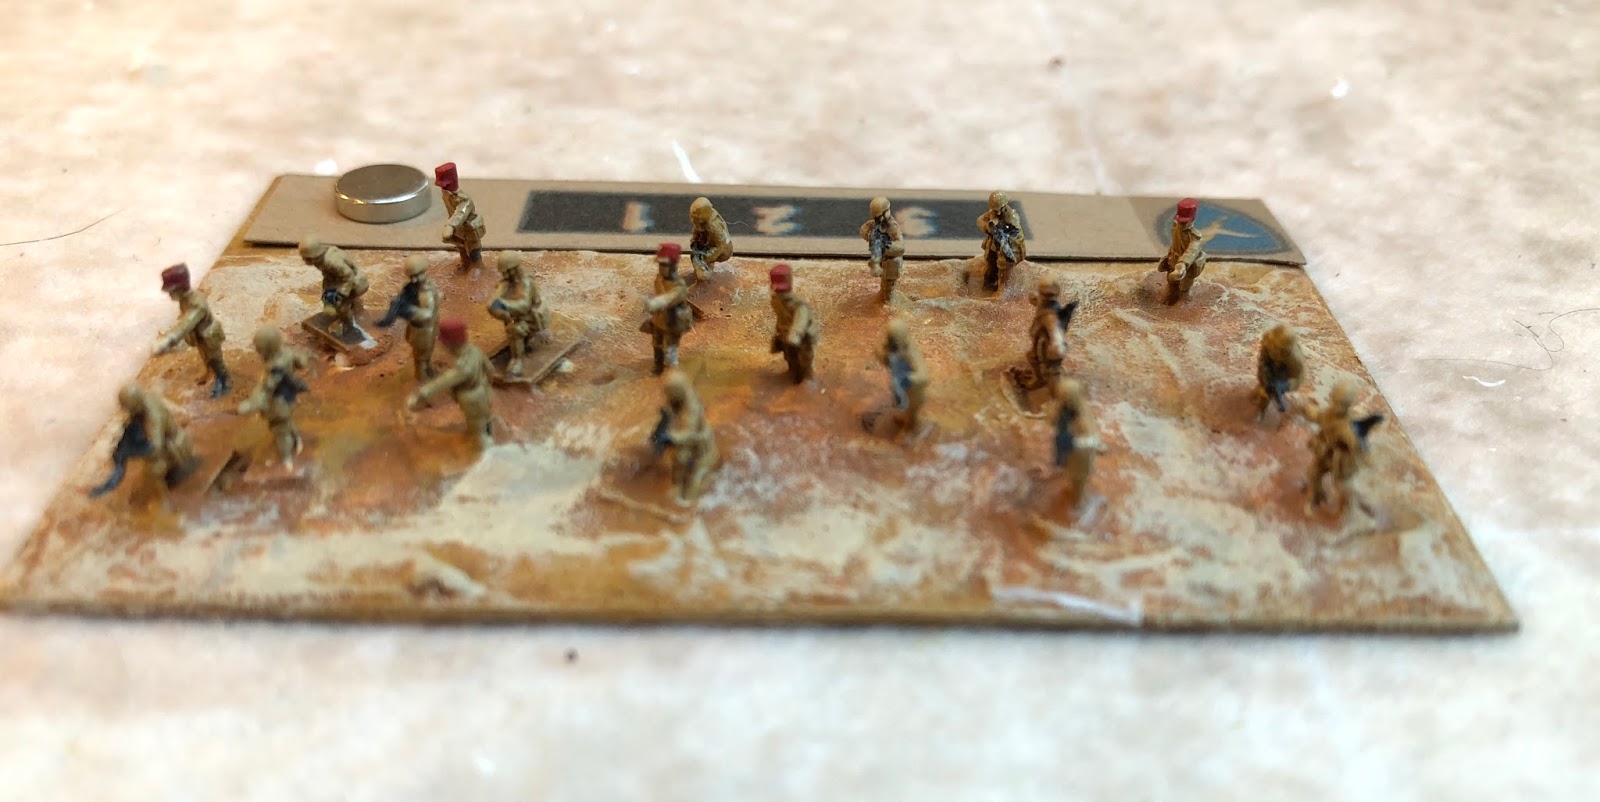
I had to decide how to populate each base. This was limited mostly by what could fit and the cost of the vehicles. I also had to represent the 5 basic types of unit that can be represented in the game. There is armour, armoured infantry, motorised infantry, legged infantry as well as artillery. The big plus for me is that in WWII North Africa aside from the Italians most infantry was motorised so I did not have to worry about painting many 6mm infantry which for me would be a real drag.

Each base in Rommel is the equivalent of a company and in most cases aside from artillery each battalion has 3 bases. I decided to go with was the following scheme of basing:

  • Tank/Armoured AT Vehicles-3 vehicles
  • Armour/Motorised Infantry-2 to 3 trucks or AFV's with 3 to 4 infantry figures
  • Legged Infantry-16 to 20 infantry figures per base
  • Artillery: 2 to 4 guns per base with transports if towed
This makes it very easy to identify what each base represents at a distance. As mentioned in my previous 
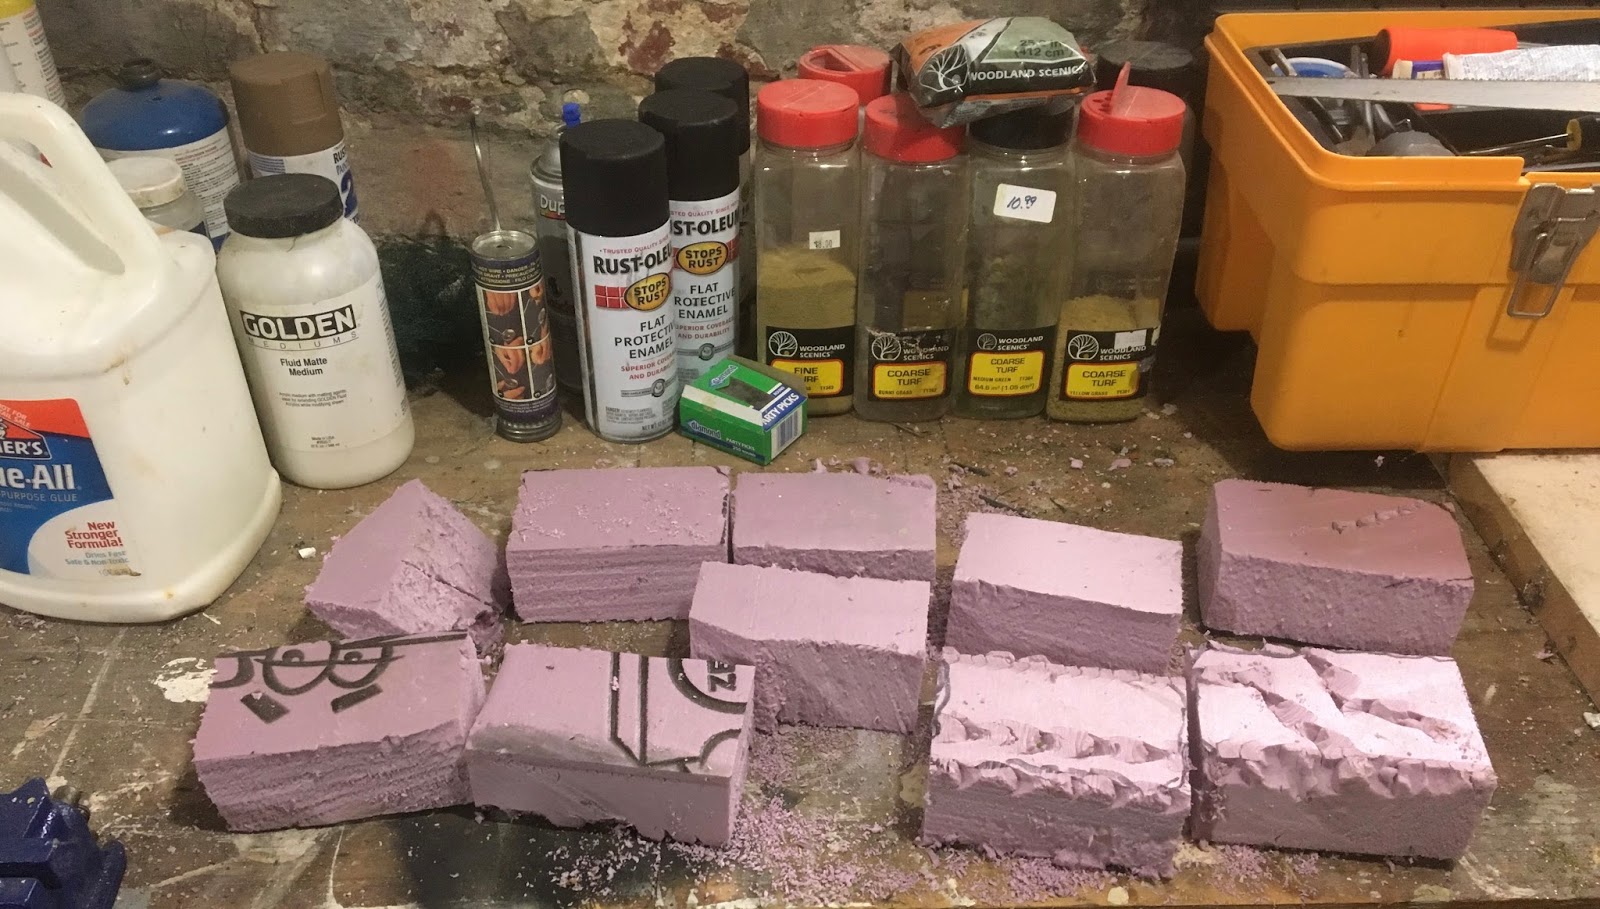
post, I have gone with a wood filler to terrain the base. I felt that sand was wrong at this scale, and the bases were painted successively with Burnt Sienna, Yellow Oxide and White tinged with a Yellow Oxide drybrush. The vehicles were fixed to the base using a gel superglue. It is expensive, but I like the control I get.

I had to decide if and how I was going to label each base with it's stats. I am by nature a non labeler, but I really could not see how to get away without labels. I really did not want dice or markers on a grand tactical battle field. I decided to go with a 60 weight card and use earth colours. I felt this was much less jarring than white. I use different colours for different armies. I felt that it was important to include the Kampfgruppe, the attrition track as well as the armour rating if any. Artillery were a little different as noted below. The labels are attached with tiny dabs of superglue gel so are very easily removed in order to change KGr or armour rating. I decided the type of tank was unnecessary to include, as this whole process has educated me in tank recognition immensely!


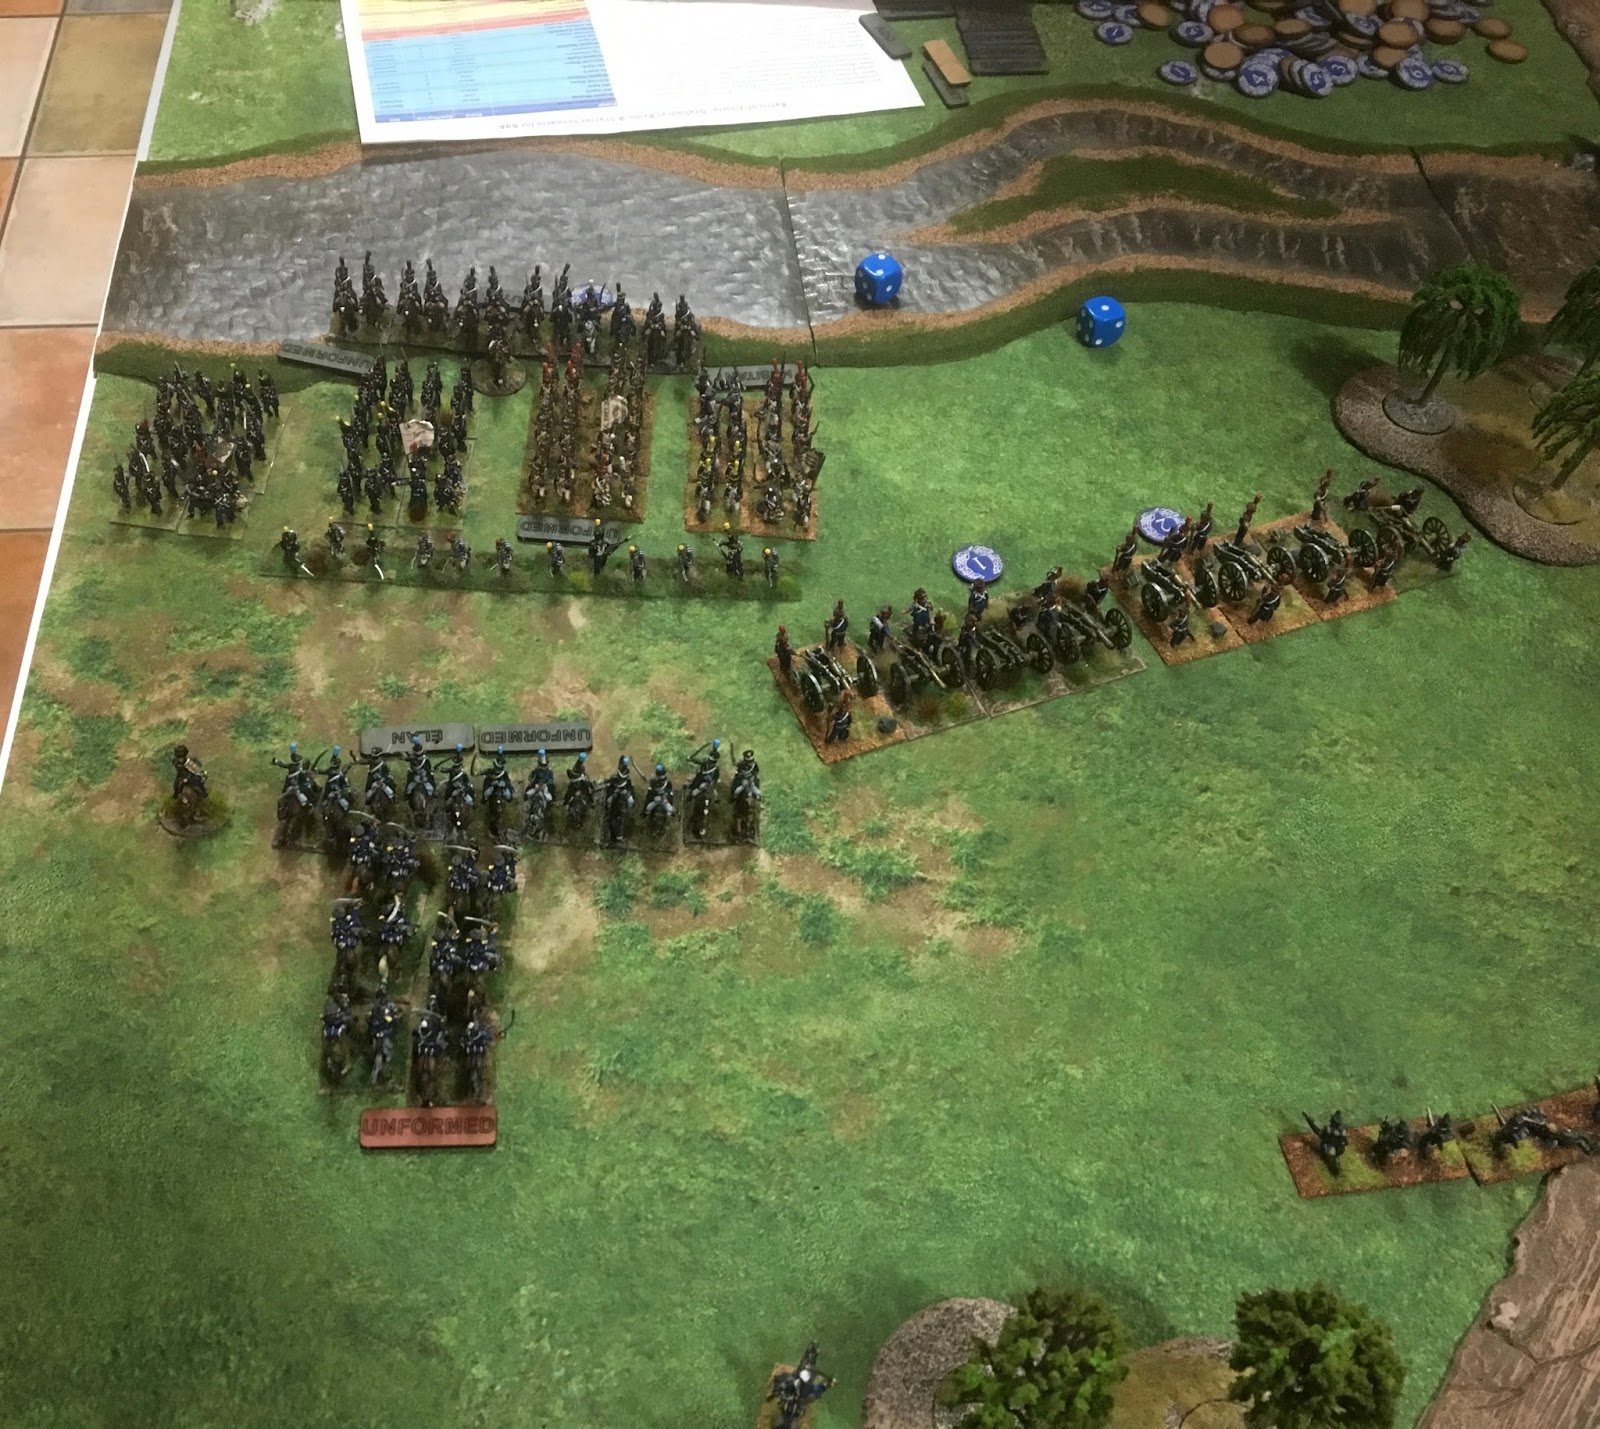
Unit Symbols: 21Pz and 15Pz, with Attrition Track and Armour Rating
Bersaglieri Company attached to 15Pz-the presence of trucks indicates that it is a motorized infantry unit.
Italian Infantry, a nightmare to paint and base! Unfortunately for North Africa you need a lot.
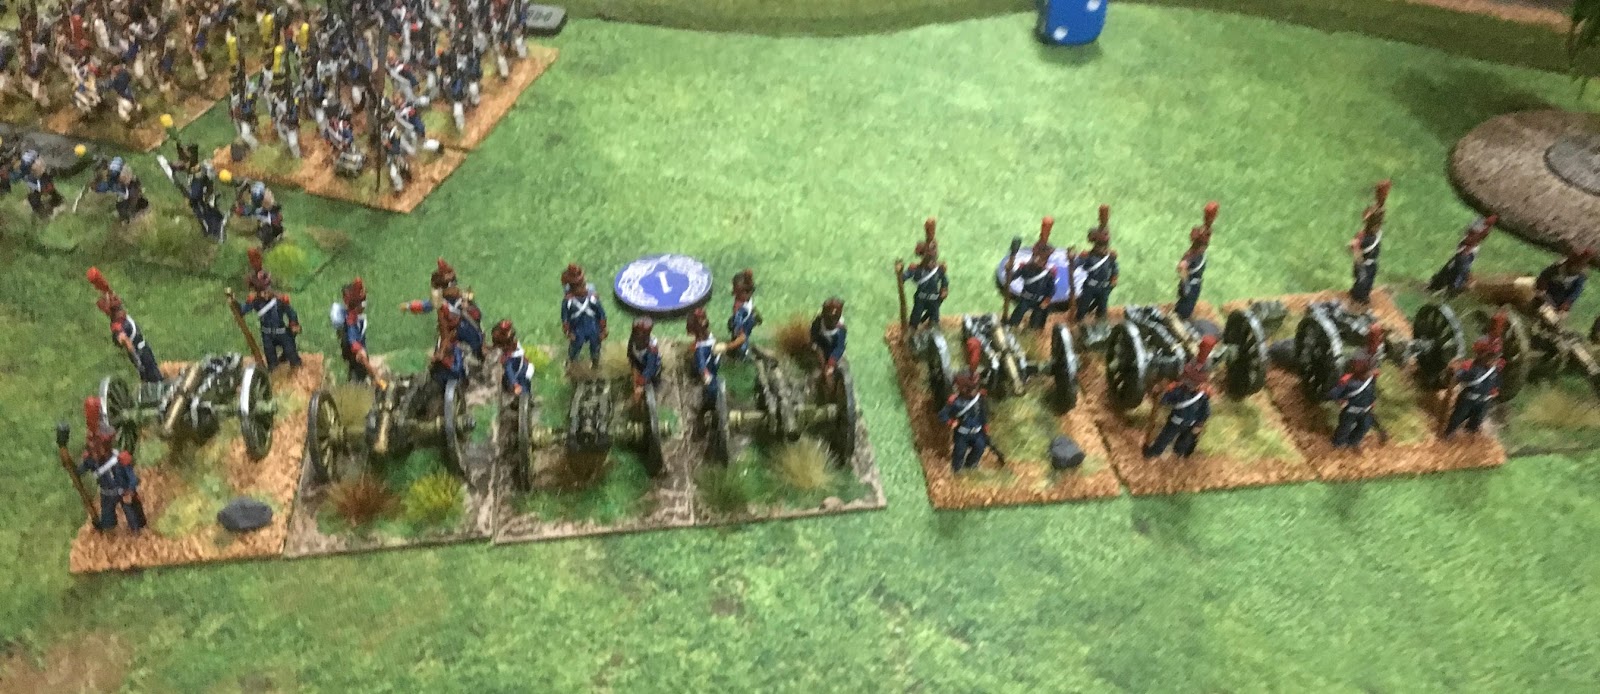
105mm Howitzer: 21Pz; range 12km, barrage value 3, 0 attack 1 defense.
The final step was how to mark the attrition track. Attrition in Rommel can move up and down, troops can recover, so I had to find something that was temporary. Here I had an Eureka moment, the bases were metal............I could use magnets that can easily move in any direction.

I might paint the magnets, I just have to decide with what.
I believe I have done 85 bases so far. I decided to start with getting the troops together so I could playtest the rules. A scenario was provided on the Honour website for Operation Brevity, but I have already gone well beyond that. More about that in my next post.

Finally, I should say that this has been one of the most exciting projects I have started. It has kept me completely engaged for the last 3 months. It has been enormous fun.

21 November 2017

Terrain for 6mm Wargaming: North African Mountains Part 2


There are lots of photos of the mountains in North Africa, I found this one the most useful as we see the mountains rising out of the desert which for wargaming WWII is the most useful. The important thing for me when painting the terrain is that mountains are pretty close to the colours of the desert plain. From looking at this photo they are quite variable in height. The first ten I made are very similar in height, but I need at least 10 more for gaming so I will keep that in mind.
The first thing to do is to fill in the bases around the cracks. I like to use wood filler, it is much more resilient than spackle or drywall compound, this one is need as it goes on pink and turns beige as it drys.  You can see it dries quickly, but is quite workable. Just wet your spatula and it immediately turns pink again and is soft. I use a brush if I want to smooth the rough edges. It was paintable in 3-4 hours.
I use this cheap acrylic that I get from an Art Shop in large bottles. I start with  Burnt Sienna followed by a very heavy wetbrush of yellow oxide. This is what I have done for the whole project all the bases have been done the same way.
The last step is a light drybrush of white with a small amount of the yellow oxide mixed in.
Here we have the first 10 pieces on a Cigar Box 6" grid desert mat. As you ca see using smaller bases allows one to place curved mountain ranges on a gridded mat. I spread them out here but you could just of easily place them abutting each other. You need about 5 bases for every four 6" grid if you do this. I find this really takes away the board game aspect of using a gridded playing mat.
As you can see the bases for the tanks are quite similar to the mountains. I suppose I could have made the mountains a little higher (they are mountains after all), but there is a point where they become difficult to store. This works for me.
The Cigar Box mat is really quite brilliant, you can barely see the lines. As you can see I have easily fit two 70x45mm bases in the 6" grid with the mountain terrain piece.
Getting very close to getting to try out those rules!

Next up is some towns, which presented a particular challenge but I will save that until my next post.

16 November 2017

An Introduction to Général d'Armée

I got a chance to introduce the Général d"Armée ruleset to my friend Iannick last night in Montreal. Iannick has been looking for the grail in respect to Napoleonic rulesets for even longer than myself and he is particular! I spent the day going through the rules as I had not played for 3-4 months, and I wanted it to be a good introduction.

I picked a Vitoria scenario that I had written when the rules came out. There is 5 brigades aside with artillery and cavalry involvement. It is a nice balance as I believe you need this many brigades to get a good idea of how the C&C function works.

The game was a first in some respects as it was the first game that I have got to host in my apartement  here, we usually play at Iannick's. I also finally got to use the portable gaming table that I purchased a year or so ago from the Czech Republic. It is 6x4' but folds down to 3x4' for transport. I was able to wrestle it into my car and transport it to Montreal where it will now stay. 

I went out and purchased  some beer and and found a pizza place that delivers (imagine that it has been almost 15 years that I have been going to Montreal and have had an apartment there for at least 5 years and I have never got a take away!).

I will not bother to write an AR, I think we got 4-5 turns in, but I did take some photos. It was a good night and I believe that Iannick enjoyed the rules. Enough so that he is planning to acquire an 18mm Napoleonic army himself. Stay tuned as I think he will be selling his 28mm Austrian and French forces and he is a great painter.

We had no really plan to finish the game but it did go back and forth. As usual we spent a lot of time talking and nourishing ourselves with food and drink. It was a good evening. I really had little cause to refer to the rulebook as the 4 page QRS is all you really need. It is a great ruleset.

Digging out the troops
The French right flank
The French left flank
4 battalion brigade
The Portuguese on the allied right flank
French Artillery
The KGL on the British left
The Guards with some 95th Rifles in the centre
The big picture
A particularly challenging cavalry duel, the cavalry rules are a lot of fun. The charge-countercharge aspect of the rules works well and  was quite realistic
Some French ligne retreating across the bridge


12 November 2017

Terrain for 6mm Wargaming: North African Mountains Part 1

Well it does say ........sometimes smaller.

For the last 6 weeks I have been working on a very large 6mm project that has yet to be identified. I am sure many of you can guess what it might be. It has been enormous fun. The research for it is quite painstaking and I have made a few errors, but overall it has been the most interesting task I have taken on in some time.

Otherwise, things have been a little slow in respect to wargaming as I have been unable to get in any games. My last game of CoC was 10 weeks ago and my last game of SAGA was 6 weeks ago. Unfortunately my 2 main gaming colleagues have been taken out of commission for various reasons. It has got so desperate that I made a plea on the TFL forum, but unfortunately it has gone unanswered. I suppose I have boxed myself in being a TFL gamer in this part of New England, my gaming club are all Black Powder, Bolt Action and DBA. All games that just do not attract me. If there is anyone out there who is a TFL fan and lives within 90 minutes of Salem, MA please get in touch!

Fortunately, I do have a Général d'Armée game teed up for this week in Montreal.

Anyway back to the post. For my the ruleset ( the one yet to be identified), I need some terrain. I have not built 6 mm terrain before so it has been interesting. Since the game is scaled in kilometers rather than in metres it has taken some adjustment. If I have it right, a 6x4' mat would be scaled at 96 square kilometers. I am also keeping in mind the Canadian 30k Epic project as well. My friend Iannick is planning an Epic bash in Montreal in the coming year so it will be good to have some terrain done.

The project is desert based, so it is mostly mountains and wadis. I am not really sure how I am going to do the wadi's but in gaming terms they will be uneven (soft, irregular etc) ground. I am also going to need a couple of towns/cities. Forest are not required and rivers will certainly be limited. Every 6" square area represents a square kilometer. 

So I thought I would start with the mountains which are really the main requirement. So here we go:

First I start with the base, I get these mdf bases from the BigRedBat's Shop. These are the 130x85mm bases which are just perfect for 15cm squares. Simon really provides excellent service.
Next up is some styrofoam. I use 2" thick blocks to start and cut them down to 40 mm in height which I think is good for 6 mm vehicles (a clue!). 
I then carve them up and use a blow torch to shape them and to seal them. We all know what happens when we use a aerosol paint on styrofoam. Do this outside. 
I cut the blocks so they are slightly smaller than the base.
Checking to see that they are roughly all in scale.
Aerial view
The all necessary PVA glue
I tried to vary it as much as possible.
Stayed tuned for Part 2.